Calculating Quilt Binding Yardage Made Easy: Step-by-Step Formula

quilt binding
QUILT BINDING

Getting ready to bind your quilt, but not sure how much fabric you’ll need?
Don’t worry — figuring out quilt binding yardage is easier than you might think!

With just a little simple math, you’ll be able to calculate precisely what you need without any guesswork.

quilt binding calculator

In this tutorial, I’ll walk you through the easy step-by-step method I use, and I’ve even put together a free printable binding formula sheet you can download to make the process even smoother.

Having everything written down on paper helps keep your project organized and accurate!

How to Measure Quilt Binding Yardage Instructions

Step 1: Measure Your Quilt

  • Measure the width of your quilt and write that number down.
  • Multiply the width by 2.
    Example:
    Width = 44 inches
    44 × 2 = 88 inches
  • Measure the height of your quilt and write that number down.
  • Multiply the height by 2.

Example:
Height = 39 inches
39 × 2 = 78 inches

Step 2: Calculate the Circumference

  • Add the two numbers together:
    88 + 78 = 166 inches
  • Add an extra 12 inches to account for binding seams and finishing:
    166 + 12 = 178 inches

This final number is the total circumference of your quilt that will need to be bound.

quilt binding strips

Step 3: Determine How Many Strips to Cut

  • Measure the width of your fabric.
    (Most quilting cotton is between 42 to 45 inches wide. Always double-check your fabric!)

Example:
Fabric width = 45 inches

  • Divide the circumference by the fabric width:
    178 ÷ 45 = 3.95

Since you can’t cut a partial strip, round up to the next whole number.
In this case, you would round up to 4 strips.
(Or even 5 strips if you want a little extra, just to be safe!)

quilt binding

Step 4: Figure Fabric Yardage Needed

If you want to know how much fabric you’ll need:

  • Multiply the number of strips by the strip width, which is usually 2.5 inches.

Example:
4 strips × 2.5 inches = 10 inches of fabric needed

Since 36 inches = 1 yard, you can see that 10 inches is much less than a yard.
Often, you can get your quilt binding from a single fat quarter or a fabric scrap you already have!

When cutting the strips, I recommend using a rotary cutter, a cutting mat, and a ruler.

This makes the job easier and you’ll get much straighter cuts than you would if you used a pair of scissors.

tip

If you want to save time, frustration, and get even cuts every time, this cutting ruler from Creative Grids Stripology works like a charm. 

If you plan to make a lot of binding or bias tape, I recommend it. (I finally bought one for myself, and I wish I’d gotten one sooner.) 

Bonus Tip: Bias Binding vs Straight Grain Binding

If you’re binding a quilt with straight edges, you can cut your strips with the grain of the fabric.
It’s faster and wastes less fabric.

If you want your binding to be cut on the diagonal (also called bias binding), that’s a little different.

Bias binding is ideal if your quilt has curved edges or if you want a diagonal stripe effect along the edge of your quilt.

👉 I have a full, separate tutorial that shows you how to cut bias strips easily! 

quilt binding

Quilt Binding Final Thoughts

Figuring out quilt binding yardage doesn’t have to be complicated.

Once you go through these simple steps a few times — and especially if you use the free printable formula sheet — it will start to feel like second nature.

A little bit of math now saves a lot of frustration later!

Watch the full video tutorial for all the best binding tips and tricks.

This video tutorial shows a very simple hack for matching the stripes when binding stsrips.

If you’re just getting started with quilting, be sure to check out the other tutorials in my Beginner Quilter Series.

I cover everything from setting up a quilt on a frame to sewing your quilt binding with simple, beginner-friendly methods.

YOUTUBE BEGINNER QUILTING SERIES

Happy quilting!


Share:

Facebook
Twitter
Pinterest

Connect:

Picture of Jan Howell

Jan Howell

Whether it’s a new recipe, a fun craft, or some handy tips for your garden and home, I hope to empower and inspire you with skills that you can use to create joy, improved health, and to do it in a simple way.

Read More

Related Posts

How To Square the Edges and Corners of a Quilt / Beginner Quilting

Square the Edges and Corners of a Quilt

In this post, I show you how to square the edges and corners of a Quilt to prepare it for binding.

In a previous tutorial, I showed you how to place your fabric and batting onto a quilting frame.  If you haven’t read that, you can find it HERE.

This trimming process works for small and large quilts and is a key skill for a beginner quilter to learn. 

Square the Edges and Corners of a Quilt

When I made this quilt, I used big stitches and followed the stripes in the fabric.

I added small crochet thread ties on the back of the quilt to help stabilize the layers.

That extra stitching was necessary because although the stitches were close enough in one direction, they were spaced too far apart in the other

If I’d used polyester batting, it might not have been a big deal—but with cotton batting, closer stitching is essential for durability and structure.

  • For cotton batting quilts, quilting lines should generally be spaced no more than 3-4 inches apart, or even closer for quilts that are washed frequently or if you prefer a more stable, less bulky feel. 
  • For polyester batting, quilting lines can generally be spaced further apart than with 100% cotton batting. Some brands recommend up to 10 inches between quilting lines, but always check the specific batting’s instructions. 

Always check the manufacturer’s recommendations on the batting package for specific guidelines. 

Tools You’ll Need To Square the Edges and Corners of a Quilt

Step-by-Step: How to Square the Edges and Corners of a Quilt

1. Start with the Corners

It’s easiest to begin by trimming and squaring up your corners first.

Square the Edges and Corners of a QuiltWhen we placed the quilt on the frame earlier, we made the backing fabric slightly larger than the top. So now we need to trim off that excess.

Square the Edges and Corners of a Quilt

Keep the lines parallel to your cuts if the quilt top has stripes or a printed pattern.

Pieced quilt tops may have uneven edges due to sewing all the panels together. 

That’s fine—we’re going for a straight and clean edge, even if we trim a little off.

2. Use the Right Ruler for the Job

You can use:

I like to start with the square ruler at the corners and then use the long ruler to connect the cuts.

3. Prep Your Rotary Cutter

Make sure your rotary cutter has a sharp, clean blade.

If it’s been a while, change it out! A dull blade can make it take longer because of having to make multiple passes to get a clean cut.

I have a separate video on how to safely change the blade and use your rotary cutter—check that out if you’re new to it.

tip

Janni Tip:

Use a hand weight to help keep your ruler from shifting while you cut.

Square the Edges and Corners of a QuiltI like using a simple 5 lb hand weight placed on the ruler. This adds stability, especially when using the longer ruler.

Square the Edges and Corners of a Quilt

4. Make Your First Cut

Line up your ruler with the edge of the quilt, just past any frayed fabric. Then, press down firmly (or use your hand weight), and make a clean cut along the edge using your rotary cutter.

If your quilt is large and the ruler is not long enough to get to the other end, just cut the length of the ruler and move on to the next corner.

Square the Edges and Corners of a Quilt

5. Connect the Corners

Once you’ve trimmed the corners, use your long ruler to connect them with a straight edge.

Double-check that everything lines up nicely.

For safety, it’s best to cut away from your body, and if needed, stand up to gain better control and leverage as you make that long cut.

Square the Edges and Corners of a Quilt

That’s all there is to square the edges and corners of a quilt.

Now that your edges and corners are trimmed and squared up, your quilt is ready for one of my favorite steps: adding the binding.

Stay tuned for the next video and blog post in the series, where I’ll show you how to measure, cut, and apply binding to finish your quilt beautifully.

Happy quilting!

Share:

Facebook
Twitter
Pinterest

Connect:

Picture of Jan Howell

Jan Howell

Whether it’s a new recipe, a fun craft, or some handy tips for your garden and home, I hope to empower and inspire you with skills that you can use to create joy, improved health, and to do it in a simple way.

Read More

Related Posts

DIY Beginner Quilting / How to Set Up a Quilt on a Quilting Frame the Easy Way

diy quilting frame setup
quilting frame series part 2

In this post, which is part two of my DIY quilting series, I show you how to set up a quilt on a quilting frame using a traditional method that many crafters have never seen before.

QUILTING FRAME FABRICMaking a quilt is a rewarding experience. There’s just something special about piecing colorful fabrics together, tying or quilting them, and connecting with others.

quilting frames with friendsIf you missed part one, where I demonstrated how to make your quilting frames out of wood, be sure to check that out first.

Now, let’s attach the fabric and batting to the frame so you can start your quilt!

Materials You’ll Need

Before we begin, gather the following materials:

  • Quilting frames – If you haven’t made yours yet, watch part one of this series.
  • Fabric – I made a baby quilt for this tutorial and cut the fabric pieces (36” x 43”). I chose a striped cotton fabric for the top and a neutral-colored flannel for the backing.QUILTING FRAME BATTING
  • Batting – I use a natural cotton batting, but polyester batting is also an option. Polyester batting tends to have more loft and makes for a cozy quilt, while cotton works well for hand-stitched quilts.
  • C-clamps—These hold the boards of the quilting frame together. I use 2.5” clamps, but 2” to 4” clamps will also work.quilting frame wrist pincushion
  • Pins – Lots of them! I use a wrist pin cushion for easy access while working. Stay tuned for the pattern and the tutorial on how to make one of these. 
  • Quilting frame stands (optional) – If you don’t have stands, you can use four chairs, your couch, or even set up the frame on a clean floor.

To make it easier for you, I’ve created a downloadable PDF with quilting size guidelines from baby to king size.

Click on the link below to download and print a copy of the quilting size chart.

Step 1: Preparing Your Fabric

Cut your quilt top to 40” x 44.5” or whatever size you want.

Cut the backing and batting slightly larger than the quilt top to allow for any shrinkage during quilting.

QUILTING FRAME BATTING
For the batting, I’m using pre-cut cotton batting that comes in a 45” x 60” package, which works well for crib-sized quilts, however, I’m going to cut it down for this small quilt.

If using cotton batting, remember that your stitches should be closer together than polyester batting.

QUILTING FRAME HALFWAY POINTMark the halfway points on your quilt top and backing fabric by folding each side in half and mark the center point using a pin or erasable fabric marker. 

You’ll also need to mark the halfway points on your frame boards. 

This will help align everything evenly during setup.

Step 2: Attaching the Fabric to the Frame

1-Set up your quilting frame. If using stands, get them ready. Otherwise, position the frame using the back of chairs or set it up on the floor and put it on the stand.

2- To start, the boards should be close together. Then, establish which boards will be the sideboards and the top/bottom boards.

Pin from the center outward, leaving about 6 inches unpinned on each end.

3- Position the backing fabric. Drape the backing fabric over the side boards with the right side of the fabric facing down.

4- Pin the backing fabric. You will pin one side at a time. Match the center mark on the fabric with the center mark on the board.quilting frame

5- Attach the top and bottom boards. These boards will rest on top of the sideboards. Let the fabric drape down until all sides are pinned to the boards. Pin the fabric in the same way.

quilting framesNow, you can start to move the stands and boards further apart.

Do not pull the fabric too tight—smooth it out so it is flat.

QUILTING FRAME6- Secure the frame with C-clamps. Adjust the crossing points of the boards so the fabric lays even and is squared, then tighten the C-clamps at each corner. (You should not see any pulling or stretching of the fabric).

7- Add the batting – Gently lay the batting on top, centering it. (Do not pull or tug the batting).

(Remember that the backing fabric was cut a little larger, so allow the fabric to come in on the frame about 1 ½ inches from the board’s inner edge).

Once that side is complete, go to the other side’s board and do the same thing.

Pin it in place just like the backing fabric. (You don’t need to put as many pins in the batting).

QUILT FRAME

8- Attach the quilt top – Lay the quilt top right side up, aligning it with the center marks on the board.

Pin the center points first. Then pin in the same manner, from the center out. (The quilt top will be smaller.)

If you need to add or remove pins to get all layers pinned to the fabric strip on boards, do so.

QUILT FRAME C CLAMPS9- Adjust C Clamps. At this stage, go around to all the C clamps and loosen and tighten them to adjust the fabric so it is squared up and the quilt top is smooth but NOT PULLED TIGHT!

quilt frame

Step 3: Choosing a Quilting Method

You’re ready to get to work once your quilt is secured on the frame. Yay!

There are several ways to finish your quilt:Upcycled Denim Jeans

  • Tying—This is a simple method in which you tie knots at intervals across the quilt. (It is a great option when using polyester batting and when you want to finish a quilt quickly.)
    A tied quilt with polyester batting is quite cozy; that is what my kids prefer.

You can view a tutorial showing how to tie a quilt HERE. 

big stitches quilt frame

  • Big stitches—For this baby quilt, I used lightweight crochet thread to make large stitches along the stripes in my fabric. I decided to add a small tie as well. (photo above).

quilt frame stitches kolby

  • Hand quilting—If you want a more intricate design, you can quilt around specific patterns on your fabric using quilting thread. I recommend using cotton batting for this method.

This method can take a lot more time, but it will give you that old-time crinkly look that we all love in a vintage quilt.

I’ll demonstrate different quilting stitches in a future post, so stay tuned for that!

rolling quilt frame

Step 4: Rolling the Quilt for Stitching

The boards on the top and bottom of the quilt were set up so you could roll the quilt as you go to have better access for quilting.

Once you can’t reach to stitch, it’s time to “roll the boards.”

1- Loosen the C-clamps at the corners of the boards you want to roll.
2- Remove pins about 12 inches from the edge

3- Roll the boards a few times until you have a close working space, but not so close that you can’t stitch.

4- Re-clamp the frame to hold the quilt in place.
You might need someone to help roll the fabric evenly on both sides for larger quilts.

storing quilt frame

Step 5: Storing and Moving Your Quilting Frame During the Quilting Process

One of the great things about using a quilting frame is that it’s portable.

If you need to move your quilt while working on it, lift the entire frame carefully (you may need help for larger quilts).

Turn it on its side and lean it against a wall out of the way. You could even move it to another room if you wanted.

If homemade stands are used, they can be easily disassembled for storage.

Bringing Back the Tradition of Quilting Bees

I want to start a monthly quilting bee with family and friends to make the quilting process even more enjoyable.

We’ll gather, chat, and quilt together like in the old days.

This will be a great way to use some of my flannel fabric stash for donation quilts and gifts!

Final Thoughts

I hope this post inspires you to try quilting the old-school way!

Remember to download the free quilting size chart from my website, YouMakeItSimple.com, and check out my other patterns and DIY tutorials.

Let me know in the comments if you’d like a tutorial on making a wrist pin cushion—it’s such a handy tool!

Stay tuned for the next video, in which my husband will show you how to make your own quilting stands.

Happy quilting!

Share:

Facebook
Twitter
Pinterest

Connect:

Picture of Jan Howell

Jan Howell

Whether it’s a new recipe, a fun craft, or some handy tips for your garden and home, I hope to empower and inspire you with skills that you can use to create joy, improved health, and to do it in a simple way.

Read More

Related Posts

How to Make DIY Quilting Frames: A Simple Guide to Hand Quilting

diy quilting frames
quilting frames generations

Quilting frames have been used for centuries before high-tech machines and elaborate setups.

hand quilting with friendsHand quilting was a tradition that brought people together, sharing stories, laughter, and creativity while making something beautiful and practical.

This social gathering was referred to as a “quilting bee”. 

What is the definition of a Quilting Bee?

A quilting bee is a social gathering where people come together to make quilts. The term originated in the United States between 1825 and 1835.

What is the purpose?

  • Community building: Quilting bees provide a place for people to come together and support each other. 
  • Socializing: Quilting bees are a chance for people to gossip, get advice, and console each other. 
  • Completing quilts: Quilting bees allow people to work together to finish a quilt in one day. 

I wish that this was more common nowadays. 

The quilts I have made and the experiences I’ve had with the family gathered around a quilt have driven me to start making more quilts and inviting friends and family over for all of these purposes.

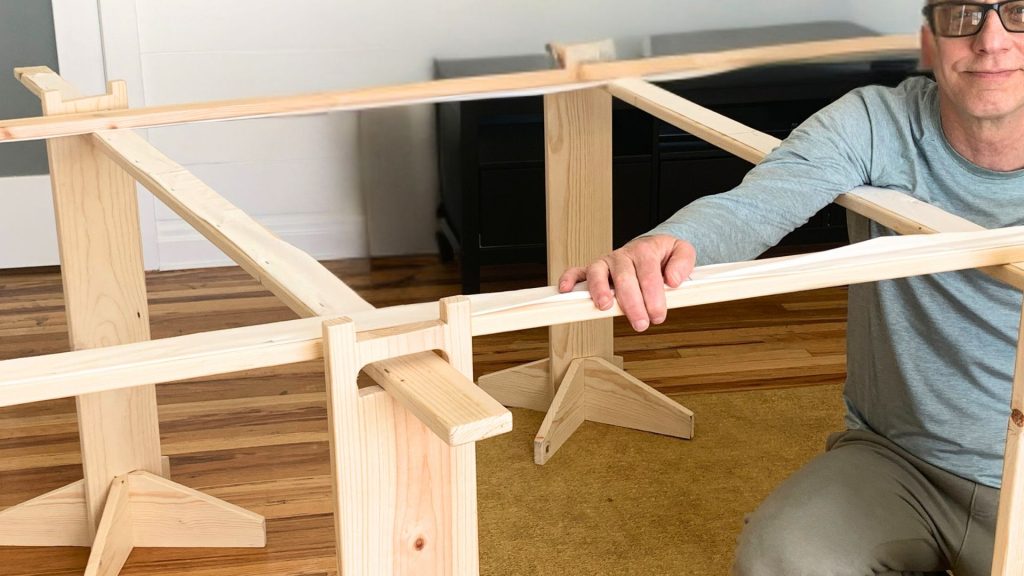
The first step for you to get started would be to make yourself a set of quilting frames.

long arm quilting frames

Quilting today can sometimes feel like an expensive hobby, with fancy machines and costly fabric.

The truth is, you don’t need a long-arm machine or an elaborate setup to enjoy this timeless craft! In this tutorial, I’ll show you how to make your own quilting frames—an easy and affordable way to bring back the joy of hand quilting.

paying under quilting frames
This is my son Sam who is now 30

Why Use Quilting Frames?

I fondly remember playing under a quilt as a child while it was stitched. It felt like a colorful tent, full of warmth and creativity.

Quilting frames are a great way to enjoy this traditional craft, and they’re simple to set up and store.

With these frames, you can:

  • Tie or hand-stitch a quilt with ease.
  • Store small quilts out of the way by leaning them against a wall.
  • Avoid the hassle of having your quilting project take over the entire living room!
  • Avoid thumbtacks

quilting frames with friendsI am so surprised that so many crafters today have never seen this technique before, and I want to bring it back.

Once you try quilting with these frames, you’ll be hooked!

quilting frames boards

Materials and Items 

Wood boards (labeled as 3×1 at the hardware store, but are actually 2.5 inches by ¾ inches)

  • 8-foot boards work well for lap quilts.
  • Consider 5, 6, or 7-foot boards for smaller projects.
  • Choose straight, knot-free boards.

Fabric strips for attaching the quilt

  • A high-thread-count upcycled sheet works best.
  • Cut into 6-inch strips.
    (Measure the length of the board you are using and subtract 5 inches; this will be the length of the strips).
    You will need four strips of fabric. (DO NOT PIECE STRIPS TOGETHER TO FORM A LONG STRIP.) I recommend using an upcycled sheet with a high thread count. 

 A queen or king sheet works well.

 Instructions

1. Preparing the Fabric Strips

  • Cut four fabric strips to match the length of your boards minus 5 inches.
    Fold each strip in half and press well.
  • Fold it again to measure about 2 inches wide, with raw edges folded in.
  • Staple or tack the strips along the edge of each board, leaving a small gap along the folded edge.
quilting frame boards

2. Selecting and Preparing the Boards

You may have to look through several boards to find some good ones.

  • Choose straight boards without large knots.
  • Sand all edges smoothly to prevent splinters.
    Use a 80-110 grit sandpaper on the first pass and 220 grit paper for the final pass.
  • Wipe the boards with a damp cloth to remove dust.
quilting frames

3. Attaching the Fabric Strips to the Boards

You can staple or nail the strips to the boards. 

  • Place the folded fabric strip along the board’s edge, with the cut edge of fabric on the underneath side.
  • Secure it every 3 inches with tacks or staples.
    Leave about 2-5 inches of space at the board ends.
  • If needed, use a hammer to ensure a flush edge of the staples.

4. Gathering  Supplies for the Next Step

  • C-clamps (2.5-inch recommended, but 2, 4, or 6-inch will also work).
  • Long quilting pins (about 1¾ inches long), or I like to use curved safety pins

When you have your quilting frames ready, you’ll need to learn how to attach your quilt to them.

In the following tutorial, I’ll show you exactly how to set up your quilt on the frame. 

In the 3rd tutorial in the series, my husband will show you how to make your own quilting stands. 

I hope this tutorial inspires you to try hand quilting using a simple, affordable setup.

If you enjoyed this guide, share it with your friends and family.

Stay tuned for the next post in this DIY quilting series!
Happy quilting!

Share:

Facebook
Twitter
Pinterest

Connect:

Picture of Jan Howell

Jan Howell

Whether it’s a new recipe, a fun craft, or some handy tips for your garden and home, I hope to empower and inspire you with skills that you can use to create joy, improved health, and to do it in a simple way.

Read More

2 Easy Ways To Bind a Quilt Using the Backing Fabric

quilt bindting

 Making a quilt can seem a little intimidating, especially if you’re new to sewing, but it’s actually really quite simple. In this tutorial, I’m going to show you how to bind the quilt using the backing fabric.

There are 2 easy methods that I am going to show you: hand sewing and using the sewing machine. I’m also going to show you how to add a label or tag to your quilt if you want to.

Using the backing fabric is one of my favorite ways to bind a quilt. It’s really easy, and you can use this method for any quilt that you make. If you haven’t watched my other tutorials in the quilting series, you can find them here.

quilt binding materials & supplies

Materials & Items Needed

quilt binding material and supplies

Quilt Binding: Method One

Squaring Up the Quilt

One of the first things that you’ll want to do is to square up your quilt. Now, it doesn’t have to be perfect. There’s been a lot going on with the quilt up to this point. You’ve pieced several pieces of fabric together, tied or quilted the quilt, and so there could be a lot of shifting going on. The edges are not going to be even. No WORRIES.


1- GET RID OF EXCESS BATTING

The first thing you’re going to do is get rid of that excess batting. Take your scissors and cut the excess batting along all edges of the quilt, making sure that you’re not cutting that backing fabric.

Of course, the smaller the blanket, the easier this process will be. Place the quilt on a big table, and if you don’t have a big table, you can put the blanket on the floor.

2- MARKING AND CUTTING THE QUILT TOP

The binding needs to be cut so it measures at least one inch. You may need to cut some off the backing or cut some of the quilt top down, so you have a straight line and that one-inch border.

Grab your rotary cutter ruler and or measuring tape. Take the chalk pen and mark it on the quilt top or the backing fabric where you need to cut. It helps to use the cutting ruler to get a straight edge.

Remember it doesn’t have to be perfect. Do this on all sides of the quilt.

*** Before you do any cutting, you’ll want to pull the backing fabric under so you don’t accidentally cut it. To do this, take the safety pins and pin the backing fabric so it’s out of the way. Pin and trim one side of the backing fabric at a time.

I love using these BIG QUILTING SAFETY PINS. However, you can use regular safety pins if you want. Using the ruler, line up the chalk-marking sand and cut off the excess fabric where needed. This is where the ruler and the rotary cutter comes in handy. Repeat this process on all sides of the quilt

After you have squared up the quilt and left a one-inch boarder, It’s time to pin everything in place.

binding backing

3- FOLDING AND PINNING THE BINDING IN PLACE

clipping the bindingGrab a bunch of sewing clips or pins and start in one of the corners of the quilt. Fold the cut edge of the binding to the edge of the top piece and then fold it again. Clip in place.

Let me show you how to make mitered corners. Take the extended rolled binding in the corner and fold it so it makes a little triangle and the folded edge is along the edge of the top piece as shown in the photo above.

quilt binding cornersNow fold the binding just like you did, and it will make a mitered corner. You’ll come back a little later to hand-sew those corners in place. Clip in place.

There are two ways that you can sew this. You can use a needle and thread, or you can use the sewing machine.

quilt binding

4- SEWING THE BINDING: Needle & Thread Method

The first method of sewing on the binding, I’m going to show you with a needle in the thread. This is one of my favorite ways to bind a quilt.

I find it quite relaxing and enjoyable, even though it takes a little longer. You can place the quilt on your lap, turn on a good movie or podcast and relax.

You can clip the whole quilt or you can clip about 5 clips at a time and work your way around the quilt.

sewing binding

Single-thread your needle with matching thread and knot the end with quilters not. (watch the video HERE for instructions). Start sewing anywhere on the quilt. You’ll be using basically the BLIND HEM STITCH.

quitl binding finished

Once you sew up to the last clip, you can fold and clip the next 5 clips. Continue this process until you’ve sewn all the way around the quilt.

Insert the needle into the fold of the binding from the back of the binding to the front. Hide the thread knot underneath.

Take a little stitch right at the side of the binding, through all layers. Insert the needle into the fold of the binding and directly across from where you came out on the last stitch.

Then go back into the quilt, and take another little stitch, then go back into the binding. Repeat this process until you run out of thread. Simply re-thread the needle and continue until you’ve sewn all the way around the quilt. Using the same type of stitch, so the mitered corners together. (Watch video to see the process).

sewing machine quilt binding

5- SEWING THE BINDING: Sewing Machine Method

Thread your machine and load your bobbin using a matching thread. Set your machine to a strait stitch. Length 2.5. You will be top stitching 1/8 inch from the inner fold of the binding using. You can adjust the needle to the left so you can use the edge of the presser foot as a guide or place a piece of masking tape for a guide.

More important is to keep the stitch at that 1/8 inch mark. Take your time. Before you start sewing. Bring the needle down by turning the hand wheel of your sewing machine toward you so you can sew exactly where the needle is on your binding. Make adjustments as needed.

5- SEWING THE BINDING: Sewing Machine Method

Thread your machine and load your bobbin using a matching thread. Set your machine to a strait stitch. Length 2.5. You will be top stitching 1/8 inch from the inner fold of the binding using. You can adjust the needle to the left so you can use the edge of the presser foot as a guide or place a piece of masking tape for a guide.

More important is to keep the stitch at that 1/8 inch mark. Take your time. Before you start sewing. Bring the needle down by turning the hand wheel of your sewing machine toward you so you can sew exactly where the needle is on your binding. Make adjustments as needed.

And you can take your, you can take your hand wheel and turn it toward you so you can see where that needle is going to come down. And I might need to go to the right just a little bit.

tip

It helps to place your machine on the right side of the table so you have something to support your quilt while you sew. If you don’t have a big table, you may want to get a chair or something else to support the quilt.

To keep the thread underneath from leaving a thread nest, hold onto the bobbin thread for the first couple of stitches and then let it go. This works like a charm. Who wants those bunched-up threads on the back side of your quilt? Not me.

I like folding and clipping a short portion as I go, or you can clip the whole quilt before you sew. Keep a little cup or your pin cushion close by to put your clips in as you remove them from your quilt.

Fold the corners as shown in method one. When you come to a corner, leave the needle down, lift up the presser foot and pivot the quilt and continue to sew. You will come back and hand-sew the mitered corners in place as shown above.

quilt label

6- ADDING A LABEL OR TAG ( optional)

binding tagIf I’m making a quilt as a gift, I always put a little heart or something on the backside.

I have available some fun editable PDF labels that you can download, edit and print. Editable files, and several sheets of love labels.

quilt bindtingThis is a tag that I made and printed onto this ribbon. LEARN HOW TO MAKE YOUR LABELS HERE.

I hope you can see that making a quilt is not that big of a deal. If you’ve never made a quilt before or if you have never sewn before, this is a good little project. You can start out with a small blanket and then work your way up to something bigger.

Have fun sewing!

OTHER TUTORIALS YOU MAY BE INTERESTED IN

HOW TO MAKE A DENIM PATCHWORK QUILT

Upcycled Denim Jeans – Ideas and Tips

My Top 10 Sewing Tips for Beginners | Know Before You Sew

Have fun sewing!

jan3

Share:

Facebook
Twitter
Pinterest

Connect:

Picture of Jan Howell

Jan Howell

Whether it’s a new recipe, a fun craft, or some handy tips for your garden and home, I hope to empower and inspire you with skills that you can use to create joy, improved health, and to do it in a simple way.

Read More