SEWING BY HAND | Most Important Stitches to Know

SEWING BY HAND | Most Important Stitches to Know


Knowing how to sew these 3 basic stitches will allow you to mend and create items that you might not be able to because you don’t have a sewing machine.

Although there are several other hand sewing stitches and techniques, I will only show you the basting or running stitch, the stretch stitch or herringbone stitch, and the backstitch.

Items Needed:

  • All-purpose thread
  • Scissors
  • Needle

(I recommend getting a variety of needles to have handy for different projects). For basic hand sewing, use a sharp or a milliner. You can get more technical with eye size and point types, but choose a mid-sized one for now.

  • Thimble (optional)
  • Needle threader (optional)

I recommend purchasing or making your own little sewing kit. This one comes with everything you’ll need, including my favorite fabric clips and small scissors.

It comes in several thread colors for those small mending projects.

Threading the needle

You can either use a single or double thread. I use a double thread for most projects. Please don’t get the thread too long, or it may be prone to tangling while sewing.

A good length is around 16 inches after doubling.


Knotting the thread

Unless you are just basting, each seam will need to start and end with an anchor stitch.
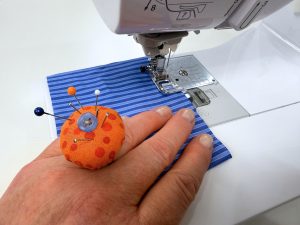
This is where you knot the thread so it will not come undone. You can make a knot at the end of your thread for most projects.

To do this, take the ends of the thread and wrap them around your pointer finger, then roll the thread between your fingers. Gently pull the thread, and it will create a little knot.

Then you’re ready to begin. To make a knot at the end of the seam, pull the needle to the backside and take a tiny stitch, leaving a little loop.

Wrap the needle around the loop once and pull the thread. This will knot the thread.

You can use an anchor stitch if you don’t want the bulk of a bunch of knots when you’re sewing by hand.

Take a tiny stitch and then another little stitch right by it. Then start your stitching. You can end a seam the same way.

SEWING BY HAND stitches that are important to know


Basting stitch/Running Stitch

The basting stitch/running stitch is excellent for temporarily holding pieces of fabric together or for quick seams that don’t need to be sturdy.

This stitch can also gather fabric for ruffles or easing in.

Take the needle in and out of the fabric with ¼ to ½ inch long stitches.

Take several stitches at a time by popping the needle in and out of the fabric before pulling through.

Stretch Stitch/Herringbone Stitch

This stitch has several names. I like to call it a hand stretch stitch because it works so well with stretchy fabrics. (The seam won’t pop and break like a straight stitch will when sewn on knit fabrics).

You can also use it for hemming and decorative embroidery and quilt making.


Drawing two horizontal lines with a washable pencil or chalk will help as a guide while sewing by hand.

Work the stitch from left to right, making little back stitches and crossing over to the other line at a diagonal.


Backstitch

The backstitch is one of the strongest, most adaptable stitches.

It mimics the straight stitch you would see on a sewing machine and is useful for simple mending jobs and other small projects. It is also useful if you plan on sewing your own clothing by hand.


To keep your seam as straight and tidy as possible, it’s helpful to mark the stitching line with a thin pencil line. You can use a sharp pencil, chalk pen, or washable ink.

On straight seams, use a ruler.


Push the needle into the fabric where you want to start the seam.

Bring the needle back through both layers of fabric just in front of the previous stitch.

Push the needle back into the fabric between where the needle came in and out of the fabric to create the first stitch.

These stitches can touch each other, as you see here, or you can space them a little farther apart.


Continue this pattern until you are at the end of the seam. Push the needle to the back side and take your anchor stitch and knot in place.


Pin your project to a firm bolster or pillow. This will allow you to sew a lot faster.

I hope this makes sewing by hand less intimidating and helps you understand how to use these three basic stitches.


Have fun sewing!

Share:

Facebook
Twitter
Pinterest

Connect:

3 Comments

  1. Hi Jan! Ironically, I was watching one of your youtube videos when I went to Google “stretch stitch hand sewing” to remind myself of the stitch my Nana taught me years ago! I’m currently just practicing, but I’m itching to do a larger sewing project this winter! Is there a specific way to finish the stitches on the herringbone stitch that makes it strong enough and it won’t break/pop? Also, any tips for making the herringbone stitches a bit tighter without getting any puckering issues? I’m seeing a LOT of stretch on my sample pieces of knit and fleece and I feel that I’m seeing way too much thread in those seams if that makes any sense? Thanks so much!

    • Hi Ash, if you want those stitches to be closer together and no puckering, make those horizontal stitches closer together, even right next to each other. Try that and let me know how it goes for you.

  2. Perfect explanation and easy to understand and follow.


Add a Comment

Your email address will not be published. Required fields are marked *

Recommended Posts